Accessibility Testing
Overview
Accessibility Check is an option available within the Add Assertion action in Web Tests.
It allows you to automatically scan a full page or a specific element for accessibility issues, helping you identify problems that may affect users with disabilities.
Accessibility checks can help detect issues such as missing labels, missing alternative text, invalid ARIA usage, insufficient semantic structure, and other violations of common accessibility rules.
Automated accessibility testing is a valuable part of a broader accessibility strategy, but it should be complemented with manual testing and human review.
How to add an Accessibility Check
To add an Accessibility Check to a Web Test:
- Open a test case.
- Add a new Add Assertion step.
- Select Accessibility Check.
- Configure the scan target and failure criteria.
- Save the step and run the test.
You can add Accessibility Check steps at any point in the test flow, so you can validate different application states as the test progresses.
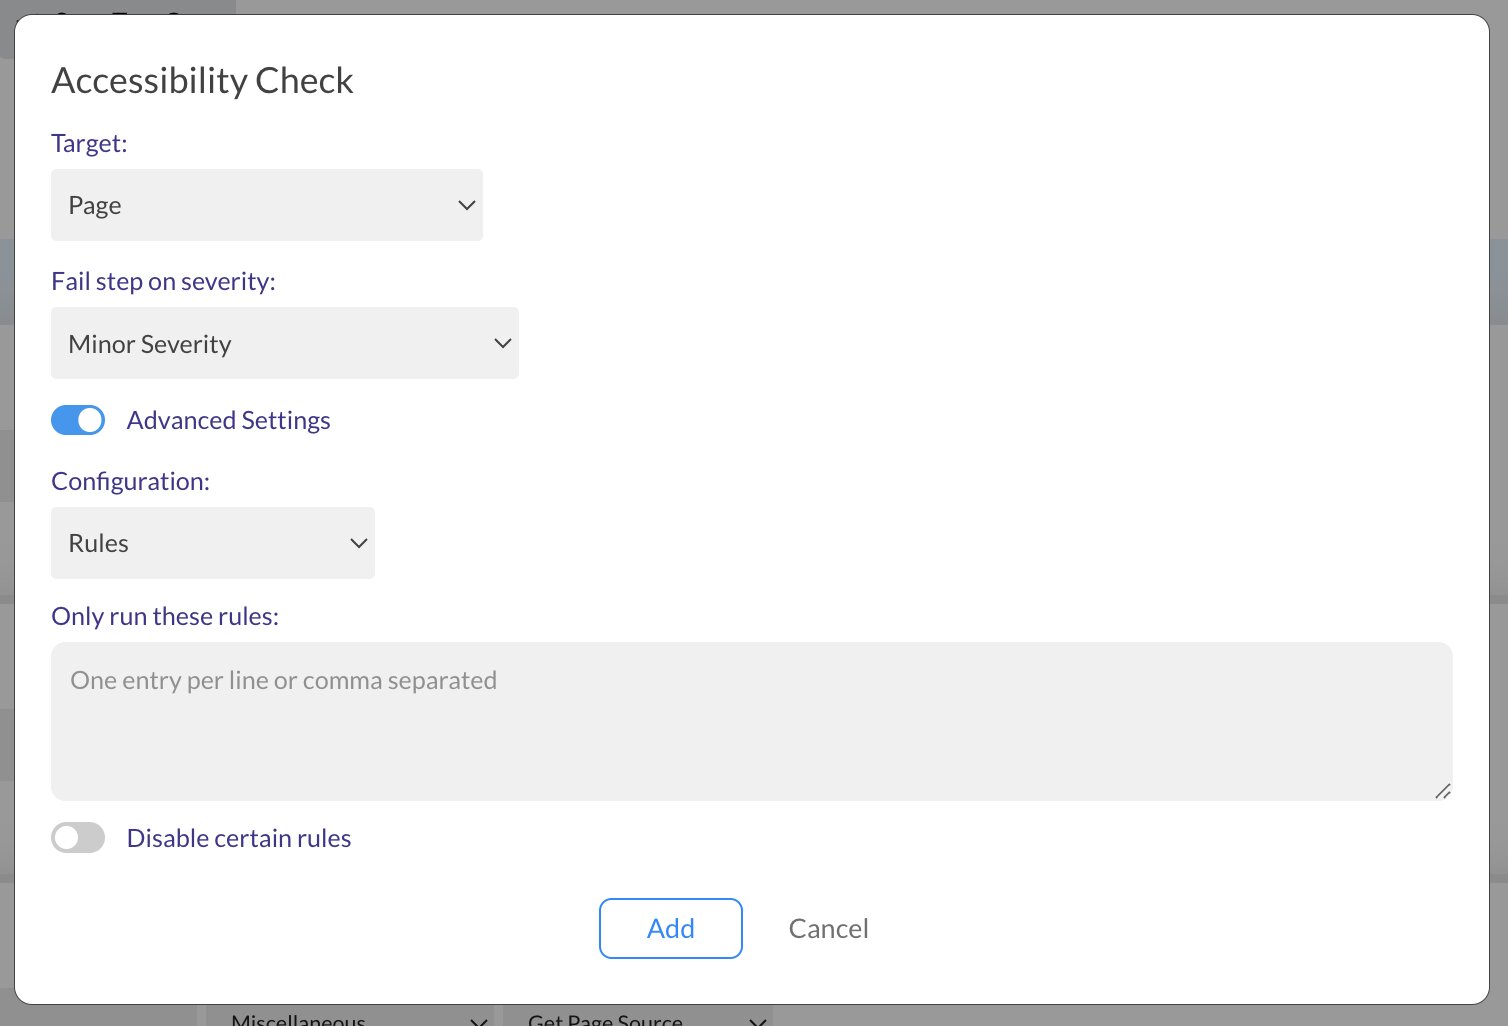
Target Options
The Target setting defines what part of the page will be analyzed.
1. Page
Select Page to scan the entire current page.
Use this option when you want a broad accessibility evaluation of the full page state.
2. Element
Select Element to scan a specific part of the page.
When Element is selected, you must provide a CSS Selector for the target element.
Use this option when you want to:
- Focus on a specific component
- Check a modal, form, menu, or widget in isolation
- Reduce noise from unrelated accessibility issues elsewhere on the page
Fail Step on Severity
The Fail step on severity option controls when the test step should fail based on the issues detected.
Available options:
Never Fail
The step never fails, regardless of the issues found.
Useful when you want to review accessibility findings without affecting test status.Critical Severity
The step fails only if critical issues are found.Serious Severity
The step fails if serious or critical issues are found.Moderate Severity
The step fails if moderate, serious, or critical issues are found.Minor Severity
The step fails if any issue is found, including minor ones.
A good starting point is Never Fail or Serious Severity, depending on how strict you want your initial checks to be.
Advanced Settings
You can enable Advanced Settings to further customize the accessibility scan.
Configuration
The Configuration dropdown lets you choose how the scan should be configured:
1. Default
Runs the standard accessibility checks using the default configuration.
Use this option when you want a balanced, general-purpose scan.
2. Tags
Select Tags to run only checks associated with specific accessibility tags.
When this option is selected, a textarea appears where you can enter the tags you want to include.
This is useful when you want to focus on a particular accessibility standard or category of rules.
3. Rules
Select Rules to run only specific accessibility rules.
When this option is selected, a textarea appears where you can enter the rules you want to test.
This is useful when your team wants to validate a specific subset of accessibility requirements.
Disable Certain Rules
The Disable Certain Rules option allows you to exclude specific rules from the scan.
When enabled, a textarea appears where you can enter the rules you want to disable.
This can be useful when:
- A rule is not relevant to your application
- You are temporarily suppressing a known issue
- You want to reduce noise while focusing on higher-priority problems
This setting should be used carefully, so important accessibility issues are not overlooked.
Reviewing the results
After the test run finishes, you can open the test results and inspect the Accessibility Check step.
The results can help you understand:
- Which violations were detected
- How severe each issue is
- Which elements were affected
- What needs to be improved
A practical way to adopt accessibility testing is to start by observing the findings, prioritize the most severe issues, and gradually tighten your failure threshold over time.
Best practices
- Start with Page scans to get an overall picture of accessibility issues.
- Use Element scans for focused checks on important components.
- Begin with a relaxed failure setting if your application has not been audited before.
- Prioritize fixing critical and serious issues first.
- Avoid disabling rules unless there is a clear reason.
- Combine automated accessibility checks with manual testing for better coverage.
Example use cases
- Check the accessibility of the full login page
- Validate that a checkout form has proper labels and accessible structure
- Scan only a modal dialog after opening it
- Fail the test if serious accessibility issues are detected on a key page
- Run targeted checks only for selected rules or tags
Summary
Accessibility Check helps you include accessibility validation directly in your Endtest Web Tests.
By combining functional test automation with automated accessibility scans, you can catch issues earlier and improve the usability of your application for more users.